Septic System Due Diligence: A Complete Buyer's Guide
Ensure a smooth home purchase with proper septic system due diligence. Verify permits, request maintenance records, and schedule inspections.
By DealAnalyzerAI Editorial Team
Real estate investing education and deal-analysis research from DealAnalyzerAI.
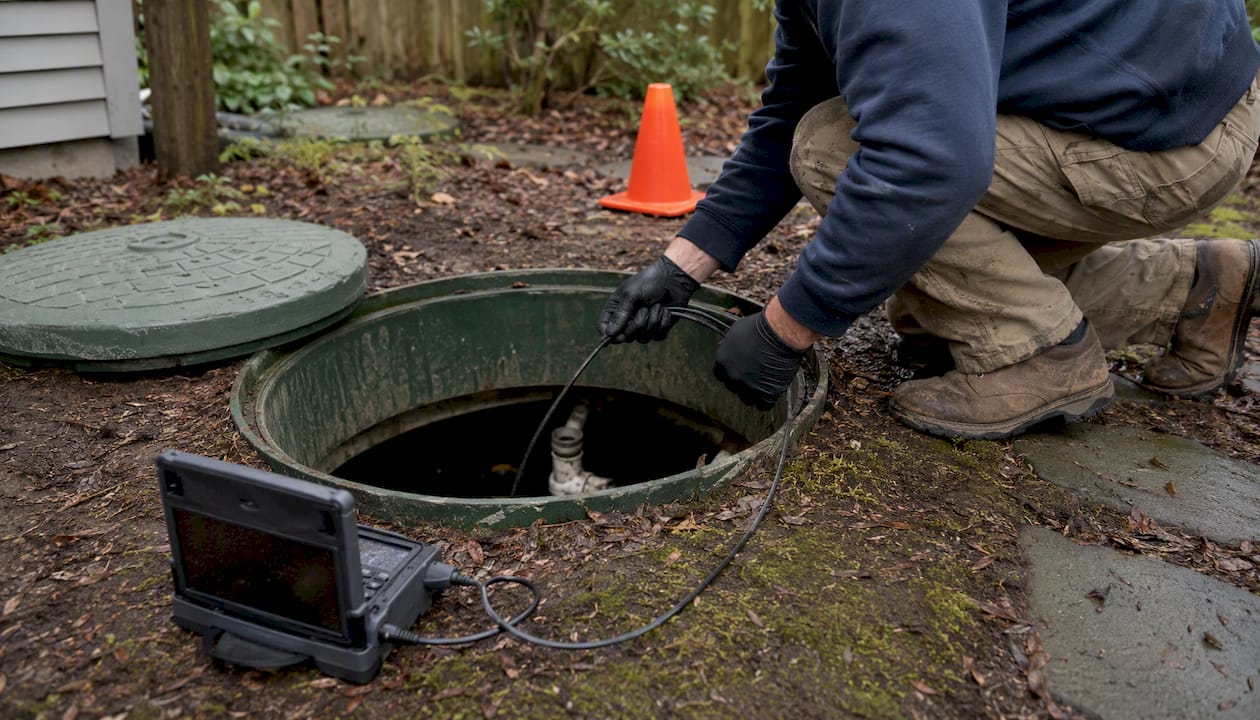
Septic System Due Diligence: A Complete Buyer’s Guide
Before you remove your contingency, verify the permit file and order a licensed septic inspection with tank access and pump-out. That single action separates buyers who close confidently from those who inherit a $5,000–$20,000+ replacement bill they never saw coming.
Start with these three moves the moment your due-diligence window opens:
- Pull the permit file and as-built drawing from the county health department.
- Request pump-out and maintenance receipts from the seller going back at least three to five years.
- Schedule a licensed onsite-wastewater inspector for a full pump-and-inspect, not a visual walk.
Pro Tip: Book the inspector on day one of your contingency period. Full inspections, including pump-out scheduling, can take three to five business days to coordinate, and you need the written report in hand before your deadline.
Key Takeaways
Septic system due diligence requires pulling permit records, ordering a licensed pump-and-inspect, and converting repair exposure into a concrete offer adjustment before removing your contingency.
| Point | Details |
|---|---|
| Inspect before you commit | A full pump-and-inspect (several hundred dollars) is the only reliable pre-purchase tool; skipping it risks a $5,000–$20,000+ replacement bill. |
| Records come first | Pull the county permit file and as-built drawing to verify permitted bedroom count and reserve-area status before ordering tests. |
| Financing can stall | Over 30 U.S. states require a septic inspection before closing; FHA and VA loans require a functioning, compliant system. |
| Negotiate with estimates | Get two written repair estimates, then choose seller repair, credit, escrow holdback, or termination based on severity. |
| Dealanalyzerai | Input septic repair costs and probability into Dealanalyzerai to calculate an adjusted MAO and risk flag before submitting an offer. |
Table of Contents
- 1. Should you pump the septic tank during due diligence?
- 2. What a licensed septic inspection actually covers
- 3. Records to pull before you trust any inspection
- 4. Warning signs you can spot during a walkthrough
- 5. What inspection, pumping, and repairs typically cost
- 6. How a failing septic system can block your financing
- 7. Negotiation options when the inspection finds problems
- 8. Your step-by-step septic due-diligence checklist
- 9. How investors should price septic risk into their offer
- Why most buyers underestimate septic risk until it’s too late
- Dealanalyzerai turns septic risk into a number you can act on
- Sources
- FAQ
1. Should you pump the septic tank during due diligence?
Pump the tank when the maintenance history is unknown, when you spot any visible warning signs, or when your lender requires it. Skip aggressive loading or dye tests on older systems. Those are the two rules that cover most situations.
A pump-out clears the tank so the inspector can see the baffles, measure sludge accumulation, check for cracks, and evaluate the inlet and outlet condition. Without it, the inspector is guessing. EPA guidance recommends pumping every three to five years depending on household size and use, so a tank that hasn’t been serviced in that window almost certainly needs one before a reliable inspection is possible.
The three common test types and when each applies:
- Visual walkover only: Cheapest, fastest, and least reliable. Flags obvious surface problems but tells you nothing about tank or drainfield condition.
- Full pump-and-inspect: Opens the tank, measures sludge and scum layers, checks baffles and filters, evaluates the distribution box, and documents findings with photos. This is the standard you should require.
- Loading/dye test: Sends a high volume of water through the system with colored dye to check for surfacing effluent. InspectAPedia warns that artificially flooding an older or dormant system can push solids into the drainfield, accelerating failure. Request maintenance history instead when a system appears fragile.
On the cost question: buyers typically pay for the inspection, but pump-out costs ($100–$400) are negotiable. Get the seller to authorize the pump-out in writing so the receipt becomes part of the deal file.
Pro Tip: If the seller claims the system was pumped recently, ask for the dated receipt from the pumping contractor. A verbal claim is not documentation.
2. What a licensed septic inspection actually covers
A full, professional septic inspection opens the tank, measures sludge and scum depths, checks inlet and outlet baffles or filters, evaluates the distribution box and drainfield condition, and delivers a written report with photographs. A standard home inspector’s visual pass does none of that.
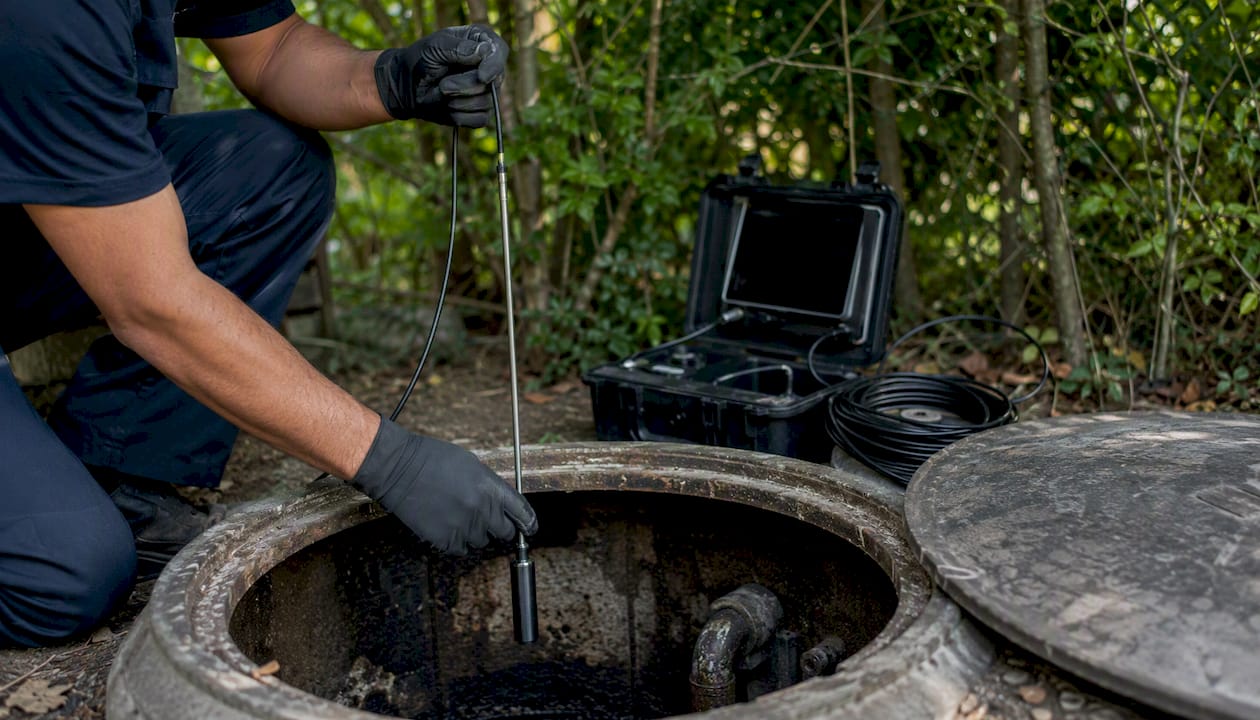
A full pump-and-inspect is the only reliable pre-purchase tool for evaluating system condition. Visual checks and dye tests are cheaper but routinely miss the failures that cost buyers the most.
Insist that the inspection report includes all of the following before you accept it:
- Tank dimensions, material, and measured sludge/scum depths
- Baffle and effluent filter condition (intact, damaged, or missing)
- Pump and alarm function (for pressure-dosed systems)
- Distribution box condition and flow balance
- Drainfield surface observations and any evidence of saturation
- Backflow test result
- Photographs of tank interior, baffles, and drainfield area
- Pump-out receipt with contractor name and date
- Written repair estimates for any deficiencies noted
A report that lacks photographs or written repair estimates is incomplete. Send it back.
3. Records to pull before you trust any inspection
Pull the permit file, as-built drawing, final approval letter, and all operation-and-maintenance records before you rely on any inspection snapshot or seller statement. SepticPath recommends starting with permit files to separate routine ownership risk from potentially large replacement exposure.
The permit file tells you four things no inspection can:
- Permitted bedroom count: If the home has four bedrooms but the permit covers three, the system is legally undersized. Adding occupants or bedrooms without a permit upgrade violates local health codes and can trigger mandatory replacement.
- Reserve area designation: The permit should identify a secondary drainfield area held in reserve for future replacement. A missing or compromised reserve area can make replacement infeasible without major expense or additional land.
- Approved design and soil data: Confirms the system type matches site conditions.
- Recorded variances or repairs: Any past failures, repairs, or regulatory variances are material to your risk assessment.
Where to get these records: call or visit the county environmental health or planning department. Most counties maintain permit files going back decades. Some post records online through a parcel search. If the seller cannot produce an as-built drawing, treat that as a yellow flag and pull the county file yourself.
Also request from the seller:
- Pump-out receipts for the past five to seven years
- Any repair invoices or contractor correspondence
- Copies of any health-department inspection reports or notices of violation
Missing records are negotiating leverage. Document every gap in writing.
4. Warning signs you can spot during a walkthrough
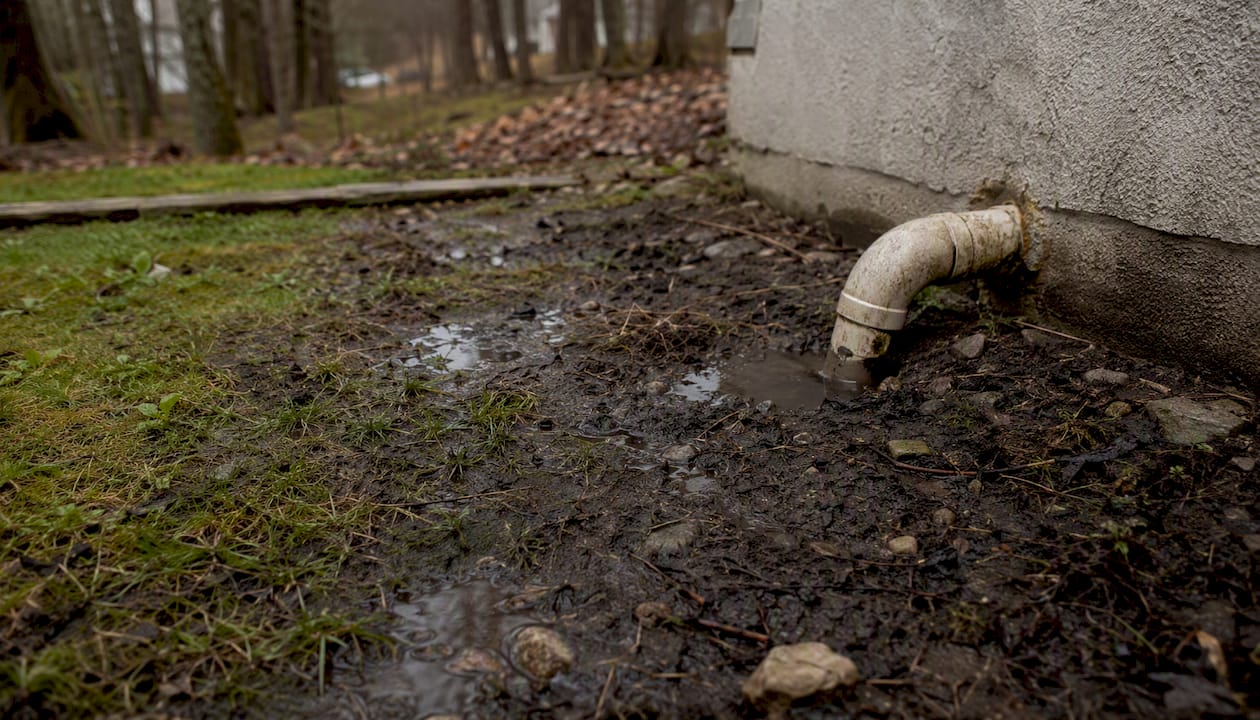
The top non-invasive red flags are soggy or saturated ground near the drainfield, a sewage odor anywhere on the lot, unusually lush green grass over drain lines during dry weather, and recurring slow drains or backups inside the home. Virginia Tech Extension research identifies these visible yard signs as reliable diagnostic cues that should trigger a full inspection and records pull.
Each sign points to a specific failure mode:
- Saturated ground or standing water near the drainfield: Effluent is surfacing because the soil cannot absorb it. This is an active failure, not a warning.
- Sewage odor outdoors: Indicates effluent is reaching the surface or venting improperly. Odors inside the home near drains suggest a different problem: a failing baffle or blocked inlet.
- Lush, dark-green grass over drain lines in dry conditions: Nutrient-rich effluent is feeding the grass. Healthy surrounding turf with a bright green stripe over the drainfield is a classic sign.
- Slow drains or backups in multiple fixtures: A single slow drain is usually a clog. Multiple fixtures backing up simultaneously points to a full tank or a blocked outlet baffle.
Pro Tip: Walk the entire lot, not just the area near the house. Locate the sewer cleanout, the tank access lid (often a green or concrete cap in the yard), and the drainfield area using the as-built drawing. Photograph anything unusual, including wet spots, depressions, or areas where vegetation is markedly different. These photos belong in your deal file.
Also check for signs of backflow prevention issues near the connection between the home and the septic lateral, particularly on older properties where cross-connections are more common.
5. What inspection, pumping, and repairs typically cost
A full septic inspection including pump-out and detailed internal checks typically costs several hundred dollars. Camera inspection of the lateral line may add to the cost. Pump-outs alone also require a separate fee depending on tank size and access difficulty.
These ranges come from pre-purchase inspection data and reflect national averages; rural areas with limited service providers often run toward the higher end.
On the question of who pays: buyers typically cover inspection costs as part of their due-diligence budget. Pump-outs are negotiable. In a competitive market, buyers often absorb the cost. In a slower market or when the seller has disclosed known issues, requesting the seller pay for or authorize the pump-out is reasonable and common.
Contract language matters here. Your offer or amendment should specify that the seller will provide access to the tank and authorize pump-out by a licensed contractor of the buyer’s choosing, with the receipt provided to the buyer within the contingency window.
Pro Tip: When a pump-out is necessary, ask the seller to authorize it and produce the receipt rather than requesting a high-volume loading test. You get the same tank-access benefit without the risk of pushing solids into the drainfield on an older system.
6. How a failing septic system can block your financing
Septic failures commonly block lender approvals. Over 30 U.S. states require some form of septic inspection or point-of-sale review before a home sale can legally close. Even in states without a mandate, FHA and VA loan programs routinely require a functioning system as a condition of financing.
Typical lender triggers and required documentation:
- FHA loans: The appraiser must note any visible signs of septic failure. If flagged, the lender requires a licensed inspection and, if problems are found, repairs and re-inspection before closing.
- VA loans: Similar to FHA; the VA requires the system to be functioning and in compliance with local health codes. A failed or noncompliant system will stall the appraisal.
- USDA Rural Development loans: Program-specific requirements apply; USDA single-family housing programs also offer repair loan options for rural buyers who need to bring systems into compliance.
- Conventional loans: Lender standards vary, but most require a functioning system. Underwriters may condition approval on a certificate of compliance from the local health department.
Point-of-sale requirements at the local level can force repairs before closing regardless of loan type. If the county health department requires a compliance certificate, the seller must obtain it. That process can take two to four weeks, which affects your closing timeline. Build that buffer into your contract.
7. Negotiation options when the inspection finds problems
Prioritize resolution options in this order based on severity: seller completes repairs and provides a re-inspection certificate; buyer receives a repair credit at closing; funds go into an escrow holdback with release conditions; or buyer terminates under the contingency.
Practical negotiation steps:
- Get written repair estimates from at least two licensed contractors before negotiating.
- Request a written scope of work from the contractor, not just a dollar figure.
- Include a re-inspection window in any repair agreement (typically five to ten days after repair completion).
- Cap escrow holdback amounts at 150% of the highest repair estimate to account for cost overruns.
- Specify clear release conditions: funds release when the buyer receives a passing re-inspection report.
Sample contingency language to include in your offer or amendment:
Pro Tip for investors: Convert the worst-case replacement cost into an offer adjustment using a simple formula. Subtract that from your maximum allowable offer before you submit.
8. Your step-by-step septic due-diligence checklist
Follow this sequence inside a standard 7–14 day contingency window. Each step builds on the last.
- Day 1: Pull county permit file and as-built drawing. Confirm permitted bedroom count, reserve area, and any recorded variances or violations.
- Day 1: Request seller documents. Ask for pump-out receipts (five to seven years), repair invoices, and any health-department correspondence.
- Day 1–2: Walk the property. Check for soggy areas, odors, lush grass over drain lines, and slow drains. Photograph everything unusual.
- Day 1–2: Schedule licensed inspection. Book a full pump-and-inspect with a licensed onsite-wastewater professional. Confirm the inspector will open the tank and provide a written report with photos.
- Day 3–5: Inspection and pump-out completed. Attend if possible. Confirm the inspector checks baffles, D-box, drainfield, and pump (if applicable).
- Day 5–6: Review inspection report. Verify all required deliverables are present (see Section 2). Flag any missing items.
- Day 6–7: Obtain repair estimates. Get written estimates from two licensed contractors for any deficiencies noted.
- Day 7–10: Negotiate remedies. Choose from seller repair, credit, escrow holdback, or termination based on severity and cost.
- Day 10–12: Verify completion or escrow terms. Confirm repair completion with a re-inspection report, or finalize escrow holdback language in the amendment.
- Day 12–14: Update your deal file. Save all photos, pump receipts, permit pages, inspection report, repair estimates, and signed amendments in one folder before removing your contingency.
For a broader real estate due diligence checklist that integrates septic items with financial modeling and offer strategy, review the full investor workflow.
9. How investors should price septic risk into their offer
Convert septic inspection findings into a concrete MAO adjustment using a three-input formula: probability of repair or replacement, midpoint cost estimate, and a contingency buffer.
Reserve-area availability is the single factor that most dramatically shifts a medium-risk scenario into a high-risk one. If the permit file shows no designated reserve area, or if the reserve area has been built over or compacted, full replacement may require purchasing additional land or engineering a mound or alternative system, pushing costs well above the standard replacement range.
Key inputs to score before running the formula:
- Age and material: Concrete tanks over 25 years old and steel tanks of any age carry higher failure probability. Fiberglass and polyethylene tanks generally last longer.
- Evidence of failure: Any active surfacing, odors, or backup history moves the probability estimate up significantly.
- Reserve area status: Confirmed available reserve area keeps replacement feasible and cost-bounded.
- Permitted capacity vs. planned use: If you plan to add bedrooms or an ADU, verify the system is permitted for that load or budget for an upgrade.
Plug these inputs into your property analysis calculator alongside your ARV and rehab estimates to get a complete picture of your maximum allowable offer. For a broader framework on translating inspection findings into offer criteria, the property offer decision criteria list walks through the full prioritization process.
Why most buyers underestimate septic risk until it’s too late
Septic systems get treated like a footnote in most transactions. Buyers focus on the roof, HVAC, and foundation, then accept a visual pass on the septic as “good enough.” That is a consistent and expensive mistake.
The records-and-risk assessment that real estate deal professionals recommend goes well beyond a physical inspection. It reconciles bedroom counts, permit capacity, maintenance history, and reserve-area status before relying on any inspection snapshot. A system that passes a visual check can still be two years from drainfield failure if the maintenance history is absent and the reserve area is compromised.
Investors who skip this step don’t just risk repair costs. They risk deals that can’t close because a lender flags the system, or properties that can’t be legally rented at the bedroom count they underwrote. The most common fix-and-flip mistakes include exactly this pattern: a hidden systems issue that wasn’t priced into the offer and surfaces after closing.
Treat septic due diligence the same way you treat roof and HVAC checks: mandatory, documented, and resolved before you remove your contingency.
Dealanalyzerai turns septic risk into a number you can act on
Septic exposure is only useful information if it changes your offer. Dealanalyzerai’s AI-powered deal analysis tool lets you input inspection findings, estimated repair or replacement costs, and probability assumptions, then instantly calculates the adjusted MAO and flags the deal’s risk level alongside your ARV range.
Upload property photos and Dealanalyzerai’s AI estimates rehab costs, including septic replacement assumptions, without waiting for a contractor bid. You get a consistent, documented offer number in minutes, not days. For investors screening multiple properties weekly, that speed and consistency is what keeps deal flow moving even when a property has a complicated septic situation. Run your next septic-adjusted offer at Dealanalyzerai and see the MAO before you negotiate.
Sources
For deeper regulatory, technical, or state-specific workflows, these are the highest-authority resources to consult next:
- Buying a Home with a Septic System: What to Know Before You Close | The Septic Guide
- Septic systems: what to ask when buying a house (Virginia Tech Extension, SPES-575)
- Home Buyer’s Basic Guide to Septic Systems (InspectAPedia)
- Frequent Questions on Septic Systems | EPA
- Buying a House With a Septic System | Closing Risk | SepticPath
Your next step: call your county environmental health department and ask for the permit file on the parcel you are evaluating. Then check your state’s point-of-sale rules before you finalize your contingency language.
FAQ
How do I start septic due diligence on a property?
Pull the county permit file and as-built drawing on day one, then schedule a licensed pump-and-inspect for the first available slot inside your contingency window. Request pump-out receipts and maintenance records from the seller at the same time.
Is it legal to sell a house with a failed septic system?
It depends on the state and locality. Over 30 U.S. states require a passing inspection or compliance certificate before a home sale can close, which effectively prohibits selling with a known failed system without disclosure and remediation. Always check your county health department’s point-of-sale rules.
What is the most common cause of septic system failure?
Virginia Tech Extension research identifies hydraulic overloading from excessive water use and disposal of inappropriate materials (fats, oils, and household chemicals) as the most frequent causes of septic failure.
Do you always need to pump the tank during a home inspection?
Not always, but pumping is strongly recommended when the maintenance history is unknown, when visible warning signs are present, or when a lender requires it. A tank that hasn’t been pumped in three to five years should be pumped before inspection so the inspector can evaluate the interior condition accurately.
What is the worst thing for a septic tank?
Flushing non-biodegradable materials, pouring fats and oils down drains, and excessive water use in a short period are the most damaging inputs. EPA guidance also warns against using garbage disposals heavily, which significantly increases the solids load and shortens the interval between required pump-outs.
Recommended
Analyze Your Next Deal with AI
Get one free ARV range from comparable sales, then enter an email to reveal aggregate market insights. Full property analysis is available on paid plans.
See Your Free ARV Range